![]()
![]()
Individual Rendition
A rendition or schedule is a form that businesses must fill out each year to report the personal property they own. Taxes are based on the amount of personal property owned by individual businesses. Capture allows for the items from the rendition to be added manually or imported to the account. The value of the items reported through the schedule are based on the Personal Property Depreciation Schedule which is updated annually. The rendition status must be marked “Received” within Capture before items can be added and manipulated/regenerated each year. Accounts with limited items valued at or under $1,000 can be marked as a “Small Account” which will calculate taxes at a market value of $1,000.
This Quick Help is designed to teach the user how to mark Personal Property Renditions as Received as well as how to update the items in Capture after the Rendition has been processed. This help is designed for individual accounts, for information on mass updates please refer to the Mass Update Rendition Help or Quick Help.
1. Log into Capture

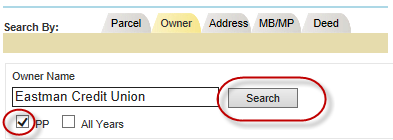
2. Search for account by (be sure to check the PP checkbox):
3. Click Search
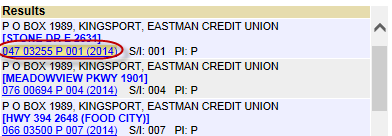
4. Open the account by clicking on account number hyperlink
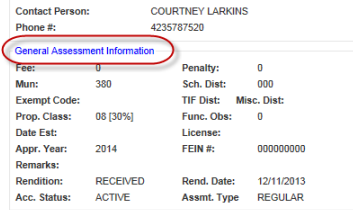
5. Click in the General Assessment Information hyper-region
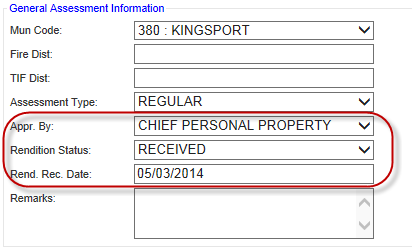
6. Update General Assessment Information
7. If you wish to calculate taxes at a market value of $1,000 check Small Account
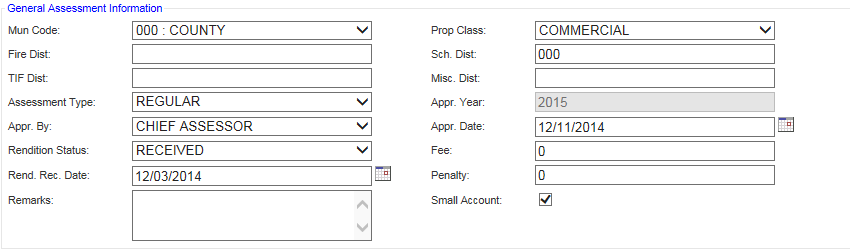
8. Click Update

9. The account’s rendition status will now be Received in the General Assessment Information hyper region
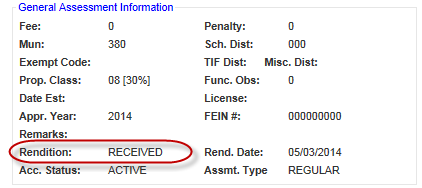
Note: To edit items rendition status must be RECEIVED
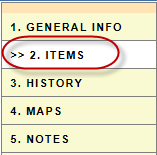
10. Click the Items tab
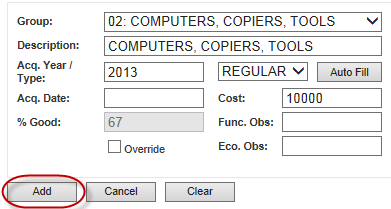
11. To add an item, click Add

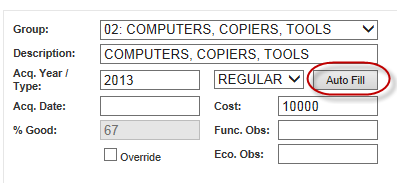
12. The Update Items screen will open, this screen allows for:
13. Fill in necessary information
14. Click Auto Fill
Automatically populates the % Good
15. Check the Leased box and enter Lessor Information if the item is leased

16. Click Add
17. The item will be added to the schedule
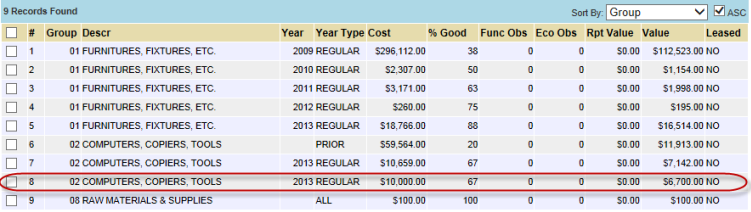
18. Repeat until all new items have been added
19. To delete an item, place a check in the box next to the item and click Delete

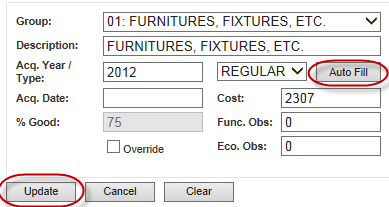
20. To edit an item, place a check in the box next to the item and click Edit

21. The item being edited is denoted by an italicized number in the Group column

22. Change necessary information
23. Click Auto Fill to update the % Good
24. Click Update
25. To change the item being updated, place a check in the box next to the correct item and click Edit

26. Repeat steps until items have been correctly updated
27. Click Cancel to return to the main Items tab
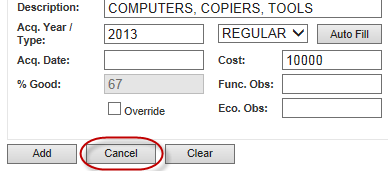
Note: Once all changes have been made to the schedule, the account is ready to be regenerated
![]()
Confidential | Copyright © 2001-2015 E-Ring, Inc.