![]()
![]()
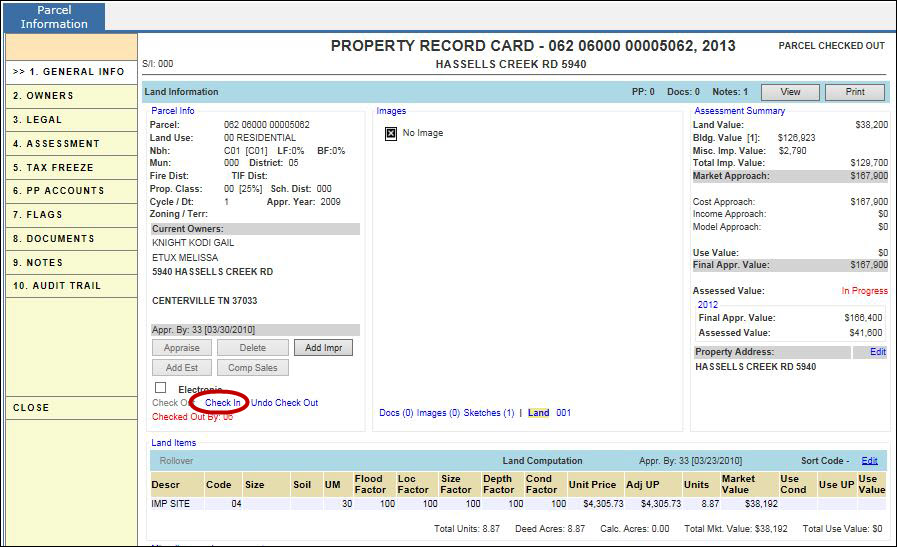
Checking Parcels In and Out
Parcels must be checked out from the General Info tab on the Parcel Information Dashboard in order for users to make appraisal and assessment revisions. It is important to note that only the user who checked the parcel out will have the ability to make changes to the parcel. After all changes are complete the user must then check the parcel back in. This help will guide the users through the process of checking parcels in and out.
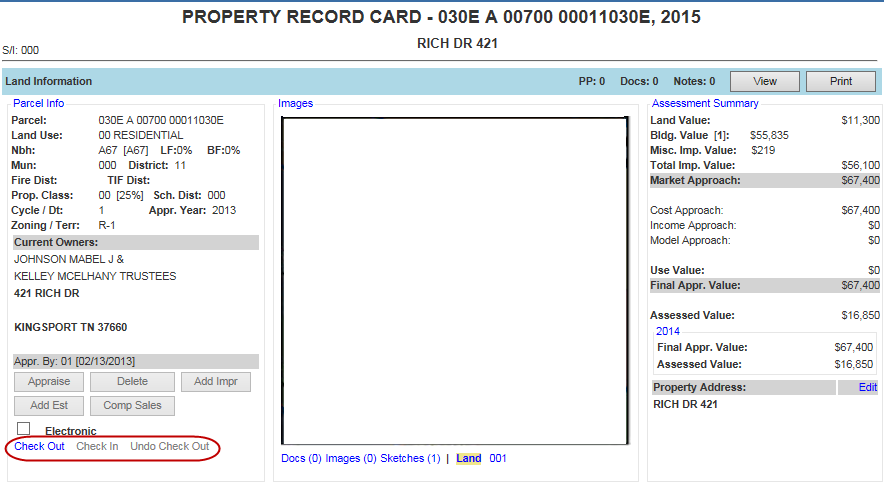
Checking Out
To Check out a Parcel:
Open the parcel's Parcel Information Dashboard
Click the Check Out hyperlink * see below image
If you are editing a building, click that building's hyperlink to open its page for editing.
Note: Most sections have certain required information that must be entered before Capture will allow a new item to be added. Capture will prompt if any required information is missed. |
Checking In Parcels
To Save Changes to Worked Parcels:
Click Check In on the General Info tab when the Land hyperlink is selected.
From the Parcel Check In screen check mark the items that apply
The Appraised By box will automatically fill in, but the Appraisal Source, Date, and Remarks must be filled in
Click Check In, the information is saved and the link is grayed out and unavailable
Note: Some items will not get audited until the parcel has been checked back in. |
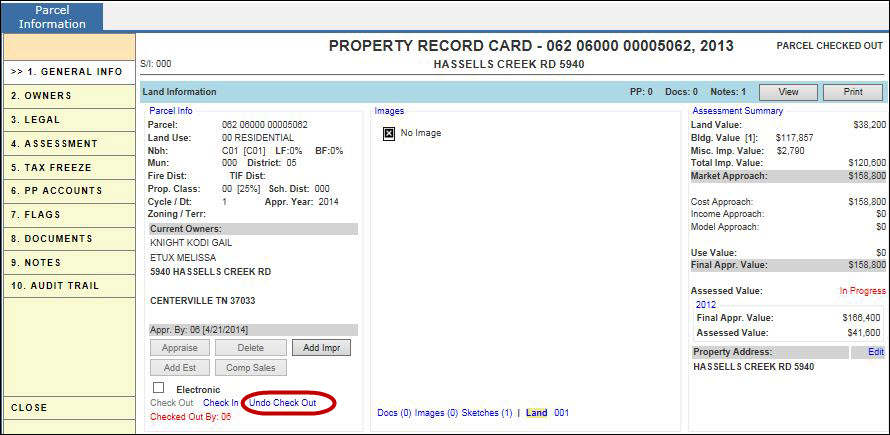
Undo Check Out
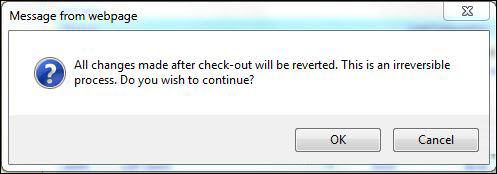
To Revert a Parcel to the Version just before checking it out:
Click Undo Check Out on the General Info tab
When the pop up message appears, click OK
To keep those changes click Cancel then go check in the parcel
Note: On the Parcel Information dashboard, if the user is the appraisal administrator, then they can undo check out another user's checked out parcel. |
When using undo-checkout and you previously moved a building with one or more images attached to the original parcel, the image(s) will have to be re-saved to a location and re-uploaded to the original parcel, because the only thing that will be moved back to the original parcel is the building and not the image.
Go to the destination parcel (where the building and image(s) moved to
Click the Images link
Locate the pictures associated with the moved building
Right-click each image
Save the image to a location
Go to the original parcel (where the building and image(s) moved from)
Click the Images link
Upload the image(s); the first one you upload will be seen in the image spot when the Land link is selected
Note: Do not click undo-checkout on the destination parcel until everything is moved back to the original parcel. |
![]()
Confidential | Copyright © 2001-2015 E-Ring, Inc.