![]()
Subdivision
Defining Subdivisions
Subdivisions are created when a developer buys a large tract of land and then decides to split the parcel into separate lots. Capture uses the Subdivision feature to create and organize the new parcels.
Parcels can be located by lot and block within a subdivision. A parcel’s lot and block description within a subdivision is determined by the land developer. The subdivision begins as a larger parcel that is defined by a metes and bounds description. The lot and block numbers are assigned as a way to organize the subdivision. Each subdivision will have a map book and page reference which gives the location for each parcel’s legal description as well as the dimensions of the parcels.
Subdivision In Capture
The Subdivisions tab in the mapping workspace accesses the Subdivision page. It is from this page that subdivisions are added, updated, or deleted.
The main Subdivision page is comprised of the following areas:
A. Subdivision Listing: All subdivisions and their relevant information are listed on this page. The Subdivision Name is a link to the Update Subdivision Dashboard.
B. Add, Update, and Delete: These buttons allow the user to create new subdivisions, update, or delete existing ones. Capture does not delete parcels associated with deleted subdivisions. Subdivisions can be added to parcels in the Legal tab on the Parcel Information Dashboard.
C. Subdivision Search: This field must be set correctly to access the correct Subdivision Dashboard.
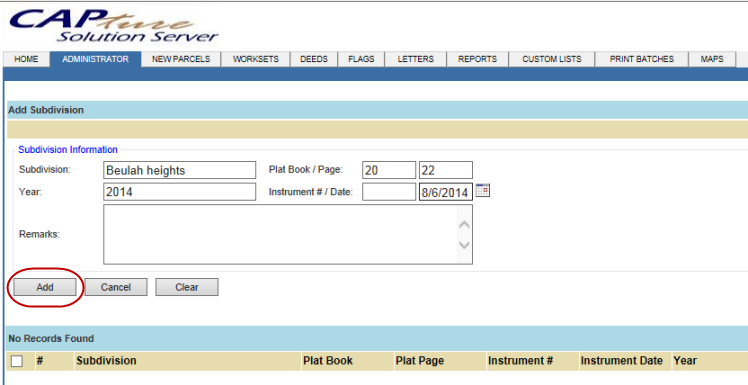
Add Subdivision
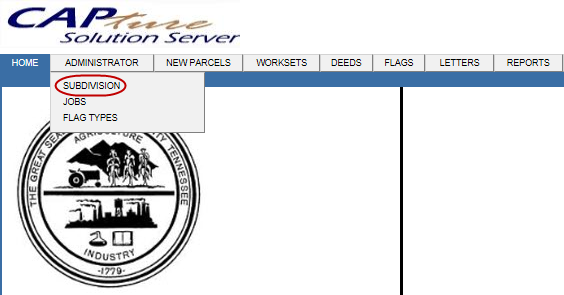
Hover over Administrator and click Subdivision
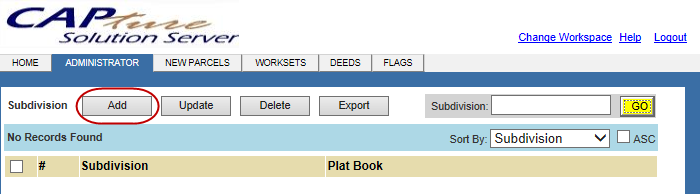
Click the Add button, enter the information requested
Click Add to complete the new subdivision
Update/Edit Subdivision
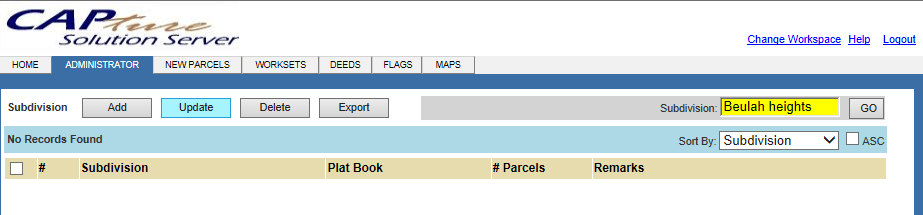
Search for the subdivision name
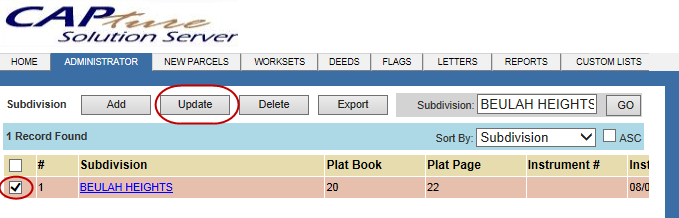
Check mark the box next to the name, click Update
Make the changes, click Update
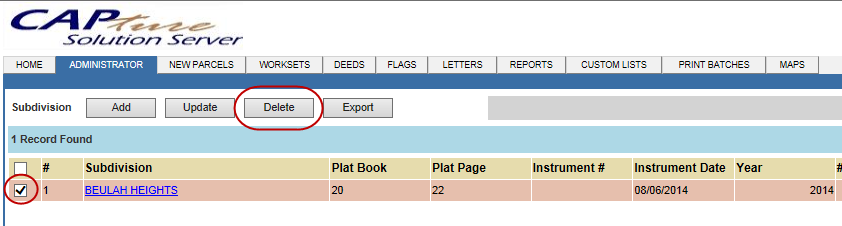
Delete Subdivision
Search for the subdivision name
Check mark the box next to the name
Click Delete
Add a Subdivision to a Parcel
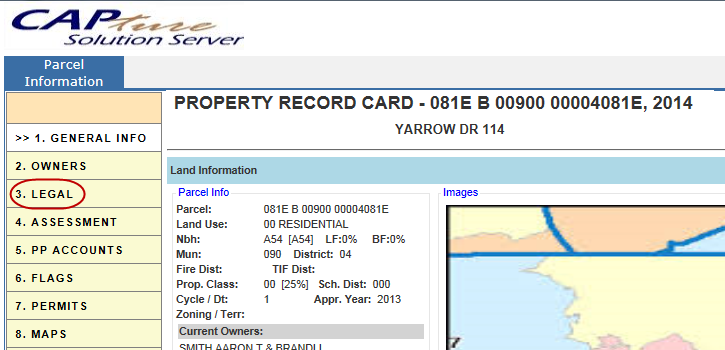
Open a Parcel Information Dashboard, click the Legal tab
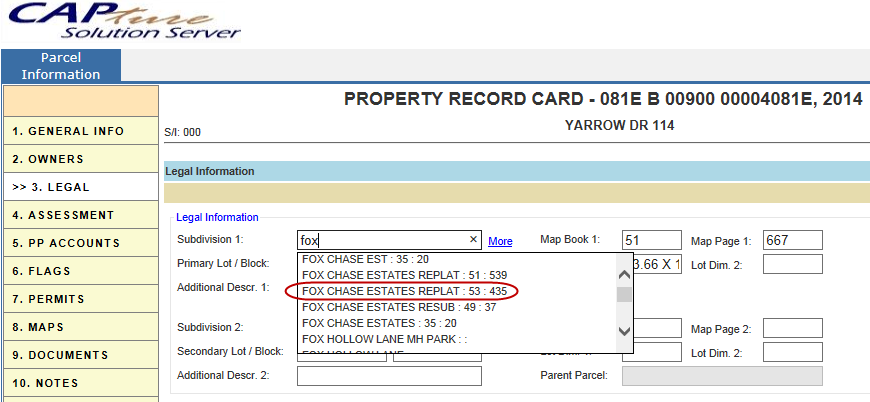
Enter the subdivision name in the Subdivision 1 box
Choose the name from the drop- down
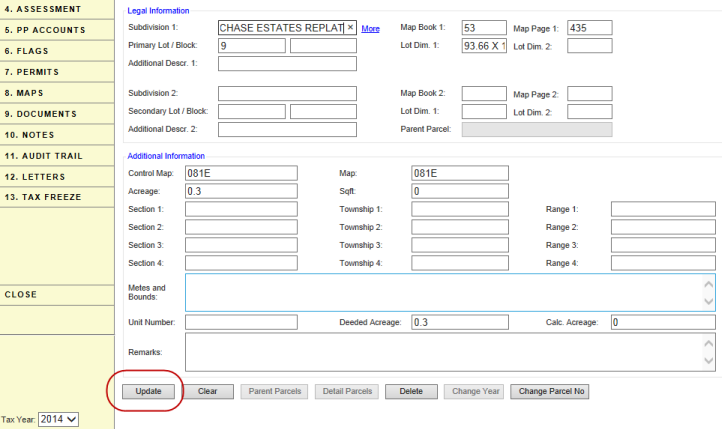
Click Update
![]()
Confidential | Copyright © 2001-2015 E-Ring, Inc.